Start by selecting a source image
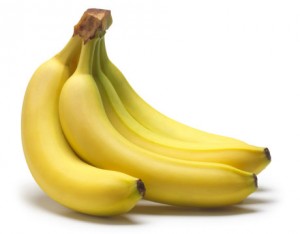
This one was found on google images by searching for banana
Open the image in GIMP/Photoshop etc
Crop to 4:3
Resize to 160×120 or 120×160
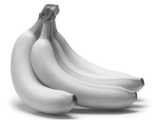
Change the colour from RGB to greyscale
It should look like this now
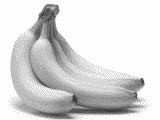
Change the colour from greyscale to indexed colour, choose, 8 colours and dithering turned on
It should look like this
This is where it gets a little tricky
for each colour of grey we want to make a square of increasing size to show how dark it is
I have written a little program that does this,if you really want I can do this step for you
see the previous post
here is the output as a PNG and PDF
The trick is now to enlarge this image to be as big as your canvas
There is a neat tool called “Poster” which is part of Linux UI package KDE, if you arent familar with command line tools the stuff below will seem like it is in a foreign language
Usage: posterinfile options are: -v: be verbose -f: ask manual feed on plotting/printing device -i : specify input image size -c : horizontal and vertical cutmargin -w : horizontal and vertical additional white margin -m : media paper size -p : output poster size -s : linear scale factor for poster -o : output redirection to named file At least one of -s -p -m is mandatory, and don't give both -s and -p is like 'A4', '3x3letter', '10x25cm', '200x200+10,10p' is either a simple or % Defaults are: '-mA4', '-c5%', '-i ' read from input file. and output written to stdout.
So with a bit of luck you can get this to produce say a 4×4 grid of a4 sheets that you can print on a standard laser or inkjet
I have attached the sample PDF for the bananas
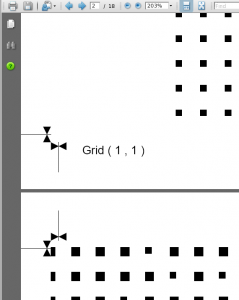
Feel free to print out 18 pages : PDF of the tiles of the poster
Using the grid references in the corner you can arrange the tiles
the little cross hairs will help you line it all up
If you wanted to cheat you could use this for paste ups
But if you want stencils then is the labourious bit
Printing onto transperancies, cutting out all the squares
If you made a tool of each square size as a punch you could save some time
Then spraying aerosol enamel paint through the squares onto canvas or whatever
You get too cut out 19200 squares, woo hoo!


Hey Sam!
Yeah this is cool -I had checked this page before. I think BP lead me here at some stage, and I like what you have done.
As I’m not on linux anymore I tried to create something similar -entirely with python. I’l re-include the link for anyone else who comes this way:
http://www.turboradness.com/?p=155
A lot of classic halftone printing style has the squares as dots. The python script I created generates dots, and does give an interesting result I think, but does not cater for random dot distribution or odd angles of the dot rows. It does interesting things recreating colour pictures, but the overall process whenether greyscale or colour is very slow. I’d love to hear how someone who actually knows how to code would recode it!
Cheers Sam, hope you’re well!
Leo
Comment by Leo — January 17, 2010 @ 10:01 am
Sorry my source is here:
http://www.hodge.net.au/sam/blog/?p=78
It uses vectors for the squares, as Scalable Vector Graphics, SVG, the opensource version of EPS/PDF.
Ill check your code when I get a chance at some stage, jsut wondering do you do it as a RGB colour space or CMYK?
Yours lives up to the name, it has turbo and radness!
Comment by admin — January 17, 2010 @ 11:01 pm